Hey there Blogger user 👋🏽
It is great that you also decided to embark on your blogging journey with Blogger.
Don't mind other platforms that oppress Blogger users. Blogger still offers a world of endless possibilities. Your blog can still grow and thrive in this platform if you set it the right way.
In this guide, we'll walk through the basic to advanced settings in the Blogger platform, ensuring your blog is fully equipped and ready for success.
In this post, I aim to guide Beginner Blogger users in setting up their Blogger blog. This would cover step-by-step instructions for each section of Blogger settings and the setup that allows your blog match up with Bigger blogs and sites.
When all these settings are made on your blog, you would also be surprised to the change.
First let's start from the Blogger Dashboard "Settings Tab"
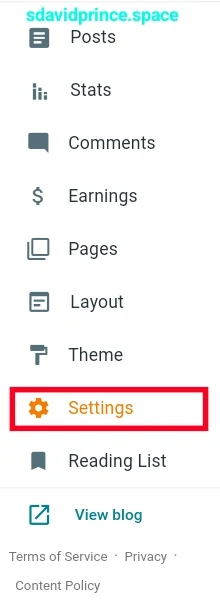
Login to your Blogger blog and go to Blogger Settings from the sidebar.
Understanding Basic Settings
- Basic Blogger Settings
- Privacy Settings
- Publishing Settings
- Https Settings
- Permissions Settings
- Post Settings
- Comments Settings
- Email Settings
- Formatting Settings
- Meta Tags Settings
- Errors & Redirects Settings
- Crawlers & Indexing Settings
- Monetization Settings
- Manage Blog Settings
- Site Feed Settings
- General Settings
Head to the "Settings" tab to configure fundamental aspects of your blog.
Here you can Adjust basic settings such as blog title, description, and privacy preferences.
The Blogger settings tab is the control center for managing various aspects of your blog on the Blogger platform.
It provides a user-friendly interface where you can configure fundamental settings, customize the layout and design, explore advanced configurations, and optimize your blog for better performance and visibility.
Here's a breakdown of the best way to setup the key features within the Blogger settings tab:
If this are all check marked, you blog would have better advantage than a average or regular site 😩 - might be a bluff as I can't prove it.
Basic Settings:
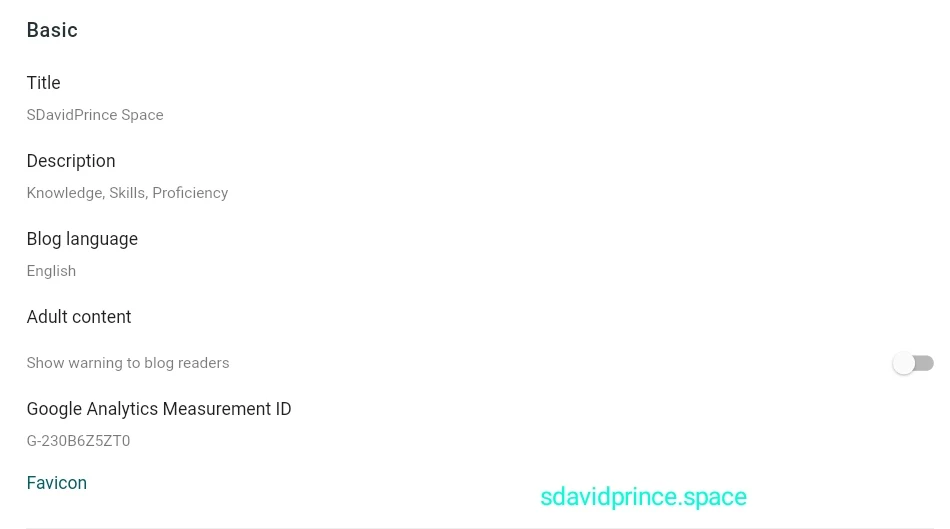
This is the first category of blogger settings feature. Here you can Configure essential details such as your blog title, description, and privacy preferences. This is where you set the foundational elements of your blog.
A more profound break on setting it up:
Title
This should be set to the name you want search engines to know your site for. Simply the name of your site. It should not be more that 100 characters.
Description
This entails of an additional description of your site. It could server as a sub-title also. It should be short and within 500 characters. Sometimes you can see it display on your blog header.
Blog language
Set this to the language your site contents are written in. This would help for regional preference and in SEO. Because search robots would understand that your blog is in a specific language and also present it to people.
Again based on this setting, the blogger interface would display according to your choosen language.
Adult Content
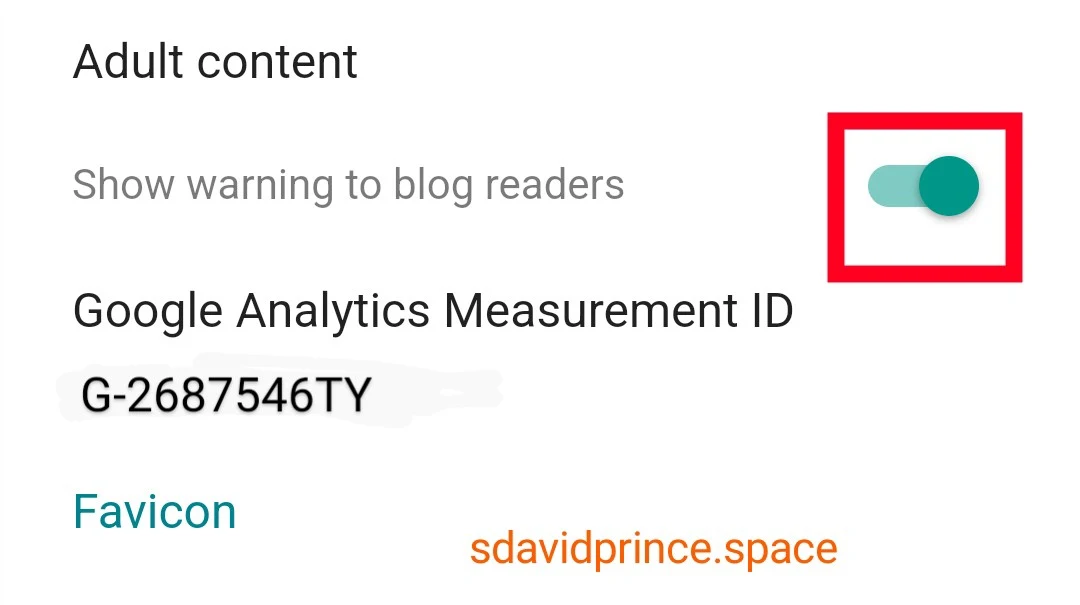
If you post obscene and adult contents such as explicit images or mature themes, enabling the adult content setting is essential to comply with Blogger policies, Legal compliance and audience consideration.
It helps ensure that your content is appropriately flagged for mature audiences. Yes blogger has no problem with adult contents but this as to be turned on.
Google Analytics Measurement ID
The Google Analytics Measurement ID setting in Blogger allows you to integrate your Blogger blog with Google Analytics.
Google Analytics provides detailed statistics and insights about your website's traffic, user behavior, and more.
Read this tutorial: How to Link Blogger to Google Analytics 4 - Measurement ID.
Favicon
The favicon setting in Blogger allows you to customize the small icon that appears next to your blog's name in the browser tab.
This icon is I'd known as Favicon and is also visible in bookmarks and on the browser's address bar.
Setting a favicon adds a professional and personalized touch to your blog, making it easily recognizable for visitors.
Ensure that your favicon image is square and appropriately represents your blog. It should also be less than 100KB.
Once you save the changes, the favicon will be visible whenever someone visits your blog. It's a small but impactful detail that contributes to the visual appeal and brand identity of your Blogger blog.
Use logo image of visit Favicon.io to generate in Favicon file format. 🥹 Check out my Favicon generator tool
Read this tutorial: How To Change/Upload Favicon on Blogger - Setup Favicon.
That's all on The Basic Settings. The next is the Privacy setting.
Privacy Setting
The Privacy Setting on Blogger only has one toggle decision. This option here is to choose whether your blog would be visible to search engines, or not.
It is an important decision that involves balancing visibility and control over your content.
It is better of for to to the toggled active. If you want you site to be visible on search engines like Google, Bing and others. So that they can index your content, and make it searchable and accessible to a wider online audience. Especially if they search on Google.
Being visible to search engines is essential for SEO purposes. It helps your blog rank higher in search engine results, making it more likely for users to discover your content when searching for relevant topics.
On the other hand, if you have concerns about privacy, limited access, or if your blog is intended for a more private or niche audience, you may choose to disable visibility to search engines. This ensures that your content is not indexed and remains more controlled in terms of who can access it.
Publishing
The publishing settings in Blogger allow you to configure how your blog is accessed and displayed on the internet.
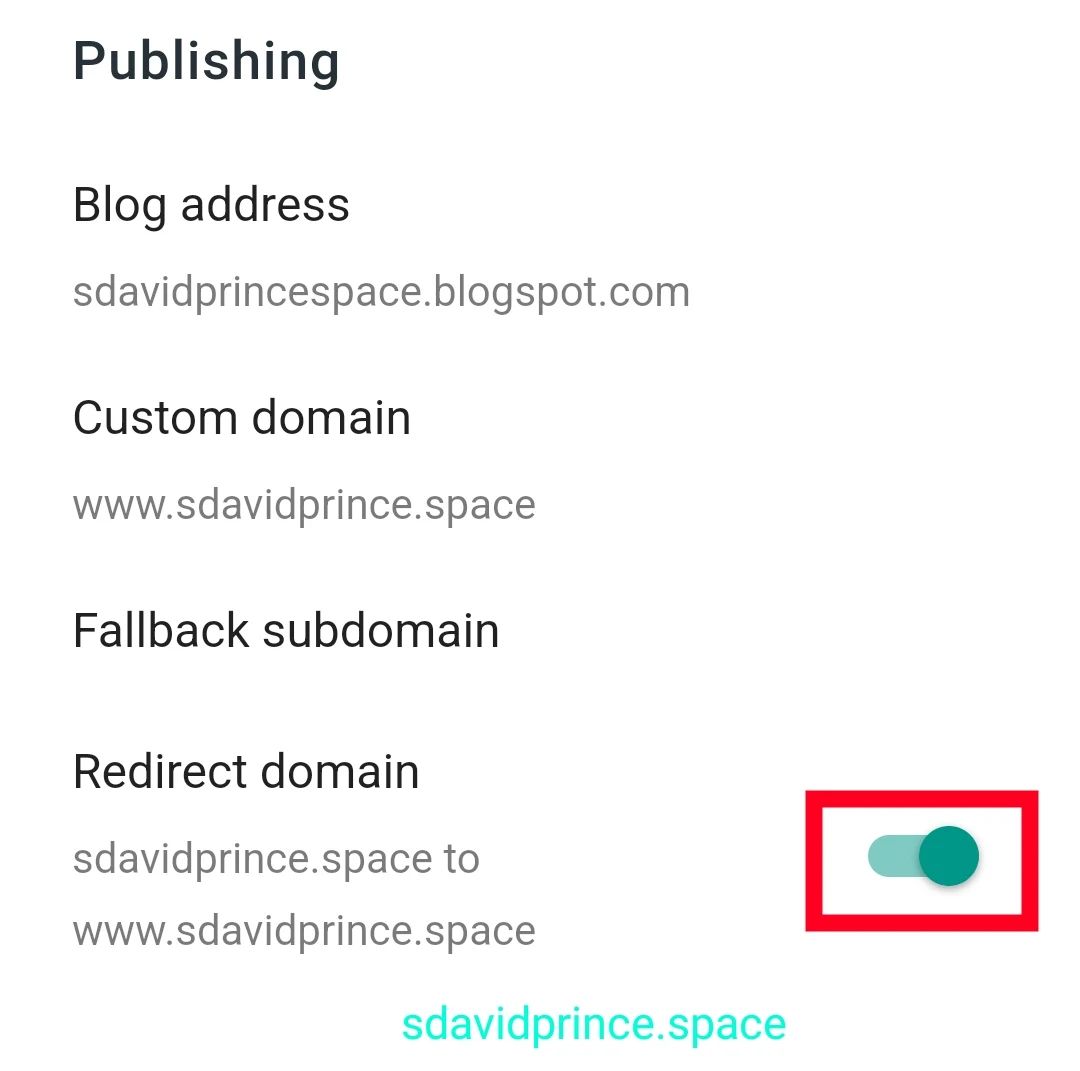
It specifically focus' on the blog address, custom domain, fallback subdomain, and redirect domain
Here's a breakdown of the key components in the publishing settings:
Blog Address:
The default blog address is a subdomain provided by Blogger, such as "yourblog.blogspot.com." This address is automatically assigned when you create a new blog on the platform.
I'm sure you set it yourself. You can also change it over and over again from this setting. But it is not recommended please Note that it affects SEO.
Custom Domain
This is an optional feature that allows you to redirect your .blogspot to a custom domain
A custom domain, like "www.sdavidprince.space," adds a personalized touch to your blog's web address.
It replaces the default Blogspot subdomain with your chosen domain name, contributing to brand identity and professionalism.
See how to connect a blogger blog to a custom domain
Fallback Subdomain
The fallback subdomain is a backup subdomain that redirects to your blog in case there are any issues with your custom domain.
For example, if someone enters "subdomain.yourblog.com," it will still redirect to your primary custom domain.
Redirect Domain
The redirect domain setting allows you to specify whether your blog naked domain should to redirect to the www.vetsion.
Example when enabled, yourblog.com would redirect to www.yourblog.com.
This way your blog can be accessible either way. This is why you should toggle it on.
This choice depends on your preferences and branding strategy.
HTTPS Settings
HTTPS stands for Hypertext Transfer Protocol Secure. It ensures a secure and encrypted connection between your blog and its visitors.
In simple terms, HTTPS is like a secure shield for your online information. When you visit a website with HTTPS, it means that any personal or sensitive data you share, like passwords or credit card details, gets transformed into a secret code before it travels through the internet.
It's like sending a message in a secret language that only you and the website can understand.
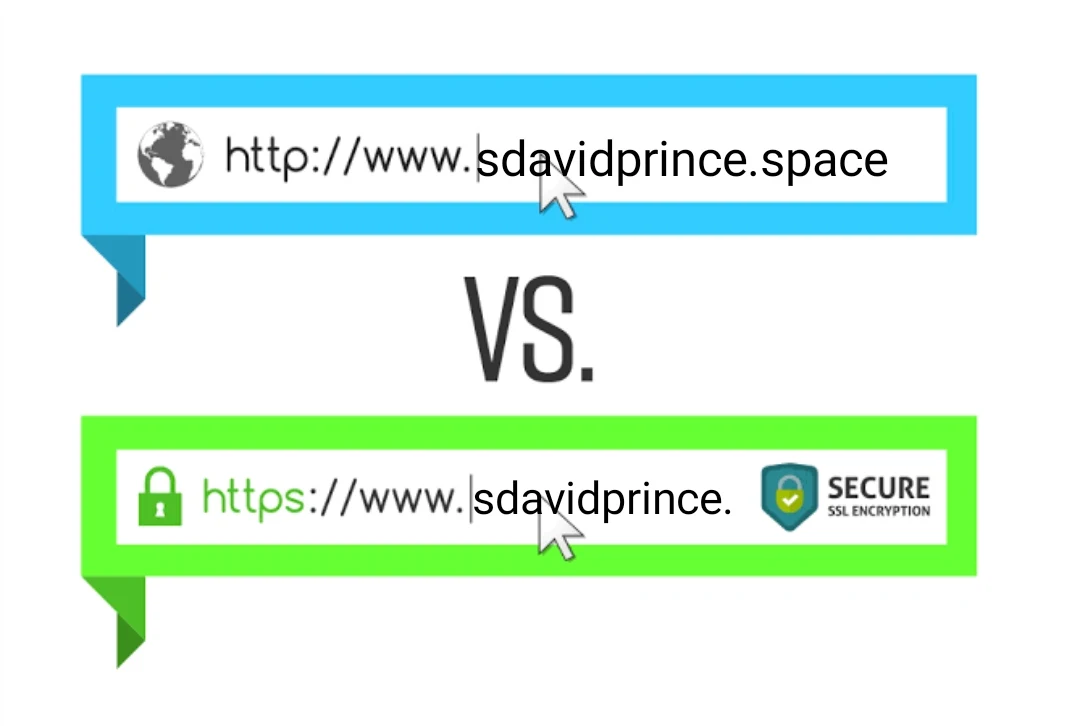
You can easily spot a secure website because it starts with "https://" instead of just "http://," and there's a little padlock icon. So, when you see a site like "https://www.sdavidprince.space," it's like a digital fortress ensuring that site users private details are safe and sound during their online journey.
HTTPS Redirect
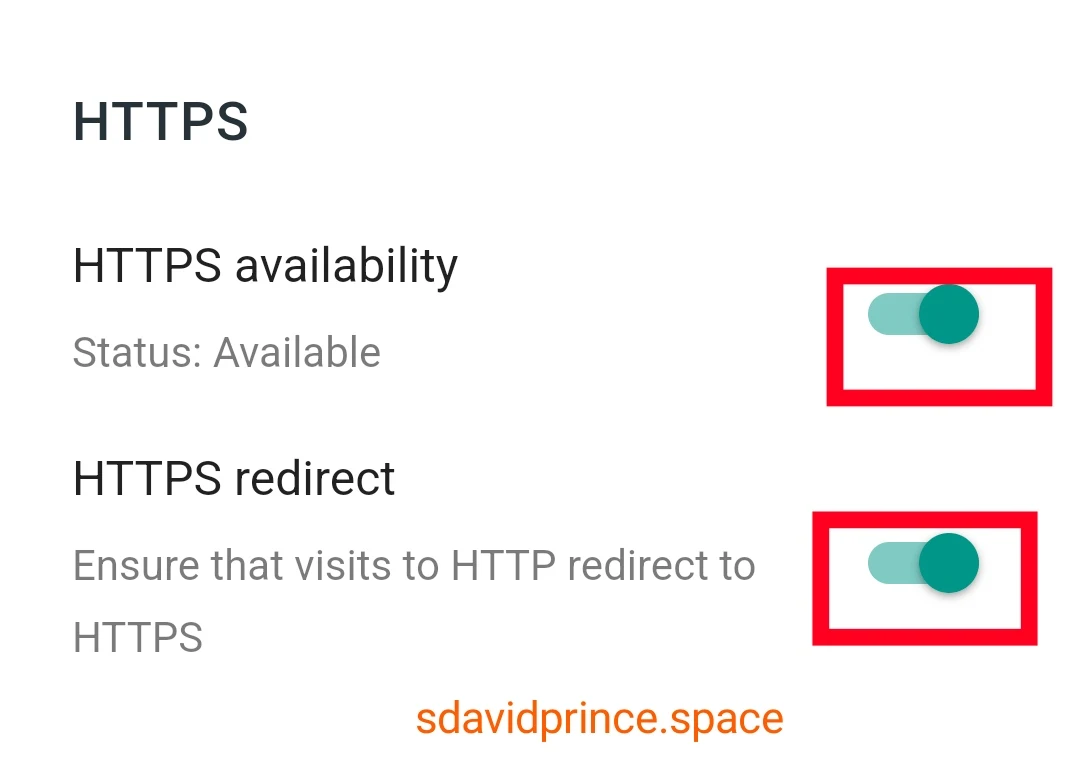
This ensures that visits to HTTP redirect to HTTPS.
Enabling the HTTPS redirect option ensures that whenever a visitor tries to access your blog using the unsecured HTTP protocol, they are automatically redirected to the secure HTTPS version.
This helps maintain a consistent and secure browsing experience for all users.
Remember that HTTPS is mandatory for every website. That’s why by default HTTPS is enabled in your Blogger settings.
If HTTPS is disabled, turn it on HTTPS redirect to enable. All URLs of your blog will be redirect from http to https. This way your site would be secured and Users would trust it.
HTTPS Availability
This option is available only for blogger custom domain. When this displays "Status - Available", that means blogger has approved to secure your domain with their SSL certificate.
You have to toggle this on also to continue enjoying HTTPS availability for your blog.
Permissions settings
Managing permissions on your Blogger site involves controlling who has access to contribute or read your blog.
Blog Admins and Authors
As your blog owner, you're the admin by default. This option shows you list of your blog’s admins and authors.
You can also delete authors/admins and change their status from the list. You can set permissions from admin to author and author to admin.
Admin would have access to everything on the blog and alcab make any changes.
Author can only write and publish posts. Author cannot edit site template and customize layout on blogger.
Pending Author Invites
This option shows you list of pending authors to whom you have sent invitations to join your blog.
Check if there are any pending author invites. If not, you're good to go. If there are, review and approve them.
Invite More Authors
This option allows you to send invitations to authors. The invitation is sent to an author through his email address. The author receives an email from Blogger to accept the invitation
If you have team members or collaborators, go to "Settings" in your Blogger dashboard, select "Permissions," and click on "Add authors." Enter their email addresses to invite them as authors. Note: Authors can only create and edit posts. You can upgrade an author to Admin to have full control access.
Learn more: How To Add and Upgrade An Author in Blogger.
Reader Access
The Reader access option allows you to set who can read and access your blog.
There are three options (1) Public (2) Private to authors (3) Custom readers.
Determine the level of access you want for readers.
Public
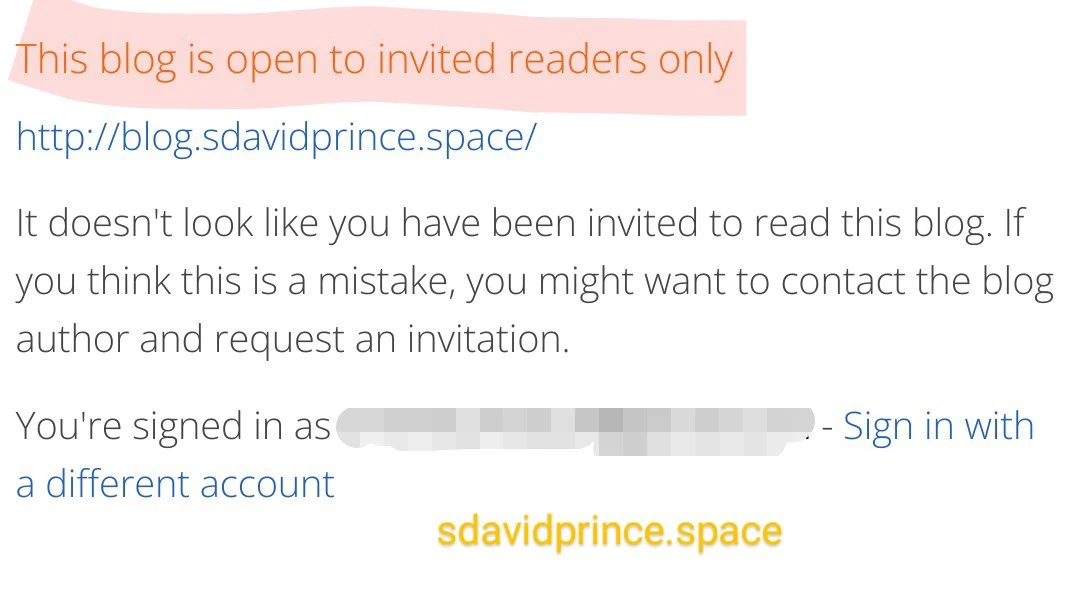
If your blog is public, anyone can read it.
Private to authors
Custom readers
Custom readers, Pending custom reader invites, Invite more readers, are active when you choose the "Custom readers" option from Reader access.
If you want more control, choose "Custom readers" to specify and invite who can access your content.
To add custom readers, click on "Invite more readers" under the "Permissions" section. Enter their email addresses and customize access levels if needed.
Pending Custom Reader Invites
Make sure there are no pending custom reader invites. If there are, review and confirm them.
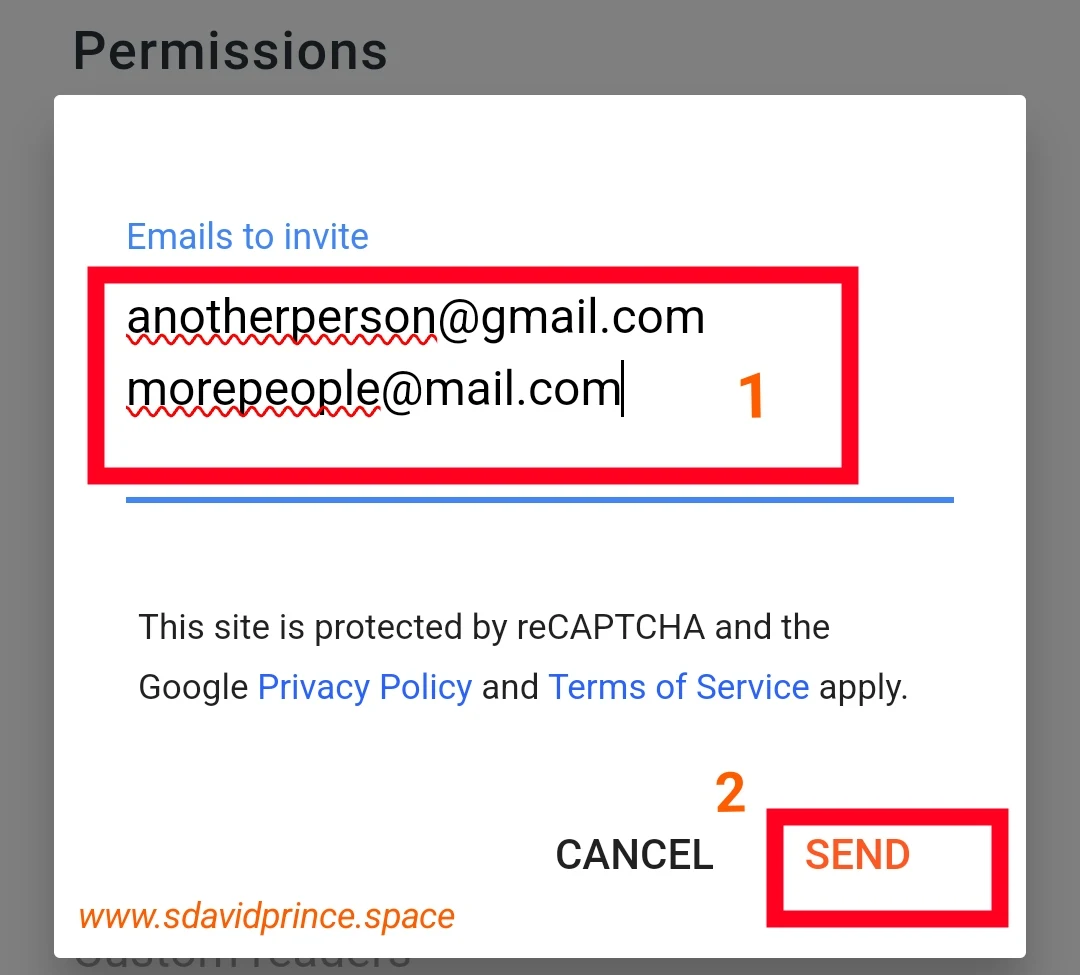
Invite More Readers
This option allows you to send invitations to readers. The invitation is sent to an reader through his email address. The reader receives an email from Blogger to accept the invitation. When invitation is accepted, the reader can then view your published contents on your site.
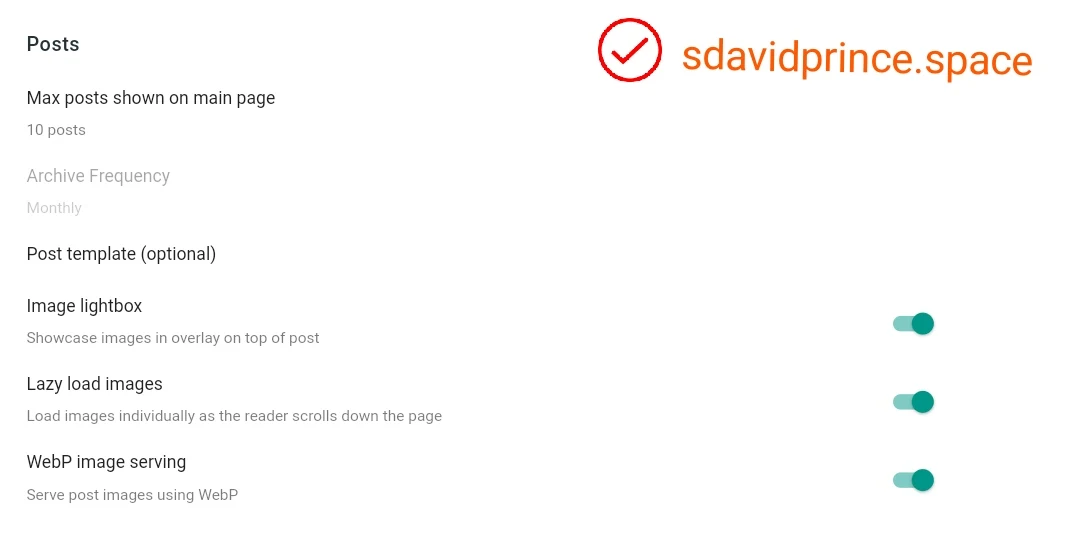
Posts Settings
Setting up the "Posts" section on your Blogger site involves configuring how your blog posts are displayed on the main page and adjusting other post-related settings.
In this section, you will learn about How to set up your Posts settings in Blogger.
By customizing these post settings, you can enhance the visual appeal and performance of your blog, providing a better experience for your readers. Here's a guide on how to set these options:
Max Posts Shown on Main Page
Here you can Decide how many blog posts you want to display on the main page. You can adjust this number based on your preference and the layout you find most appealing.
Archive Frequency
This is to Choose how often you want your blog posts to be archived. If you prefer a monthly archive, keep it as is. You can also choose other options like weekly or yearly based on your content frequency.
Post Template (Optional)
If you have a specific post template you'd like to apply to all your posts, you can set it here.
The Post Template is an advanced optional feature in Blogger that allows you to add a premade template to format your post editor with Text or HTML code.
Each time you create a new post the template will be available in your Post Editor. The Post Template feature provides re-usability, means you don’t have to create the same thing again-and-again. You can modify the content, text, images, of template in the Post Editor.
For example, you want to add the message “Please share your feedback in the comments section…..” at the bottom of every post. Simply put the message/text in the Post template, you don’t have to type the message again-and-again when you write your posts.
Image Lightbox
Decide whether you want to showcase images in an overlay on top of the post using the image lightbox feature.
Lazy Load Images
Opt for loading images individually as the reader scrolls down the page.
WebP Image Serving
Choose to serve post images using WebP format.
WebP is a modern image format that provides high-quality images with smaller file sizes, contributing to faster page loading.
That's All on this section.
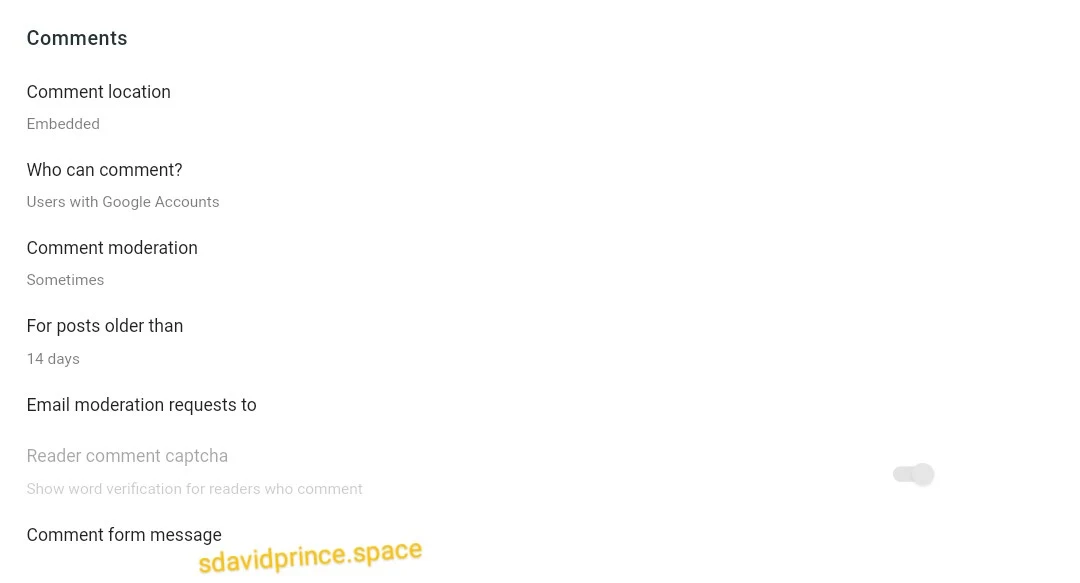
Comments Settings
Configuring the "Comments" section on your Blogger site involves deciding how and when Blogger comments are displayed, who can comment, and how moderation is handled.
By carefully setting up your comment preferences, you can foster a positive and engaging commenting environment on your Blogger blog while maintaining control over the content that appears in the comments section.
Here's a guide on setting up these options
Comment Location
The Comment location option allows you to do two things (1) Hide comments & comments section from your blog (2) Change style of comments section/box.
There are 4 options in Comment Location . That's Embedded, Full page, Popup window, and Hide.
Embedded
It is the default style of Blogger’s comment section. The comments in embedded within the post, and Comment box appears at the bottom of post.
Full page
It adds a link “Post a Comment” below the existing comments. When you click the “Post a Comment” link, the comment box appears in a full page.
Popup window
It also adds a link “Post a Comment” below the existing comments. When you click the “Post a Comment” link, the comment box appears in a popup window or in an Overlay modal.
Hide
This option hides all existing comments from your blog posts, and visitors cannot post new comments.
Who Can Comment
The Who can comment? option allows you to set who can post comments in your blog posts.
There are 3 options:
(1) Anyone (including anonymous)
(2) Users with Google Accounts
(3) Only members of this blog.
Decide on your comment audience, you can adjust this setting accordingly.
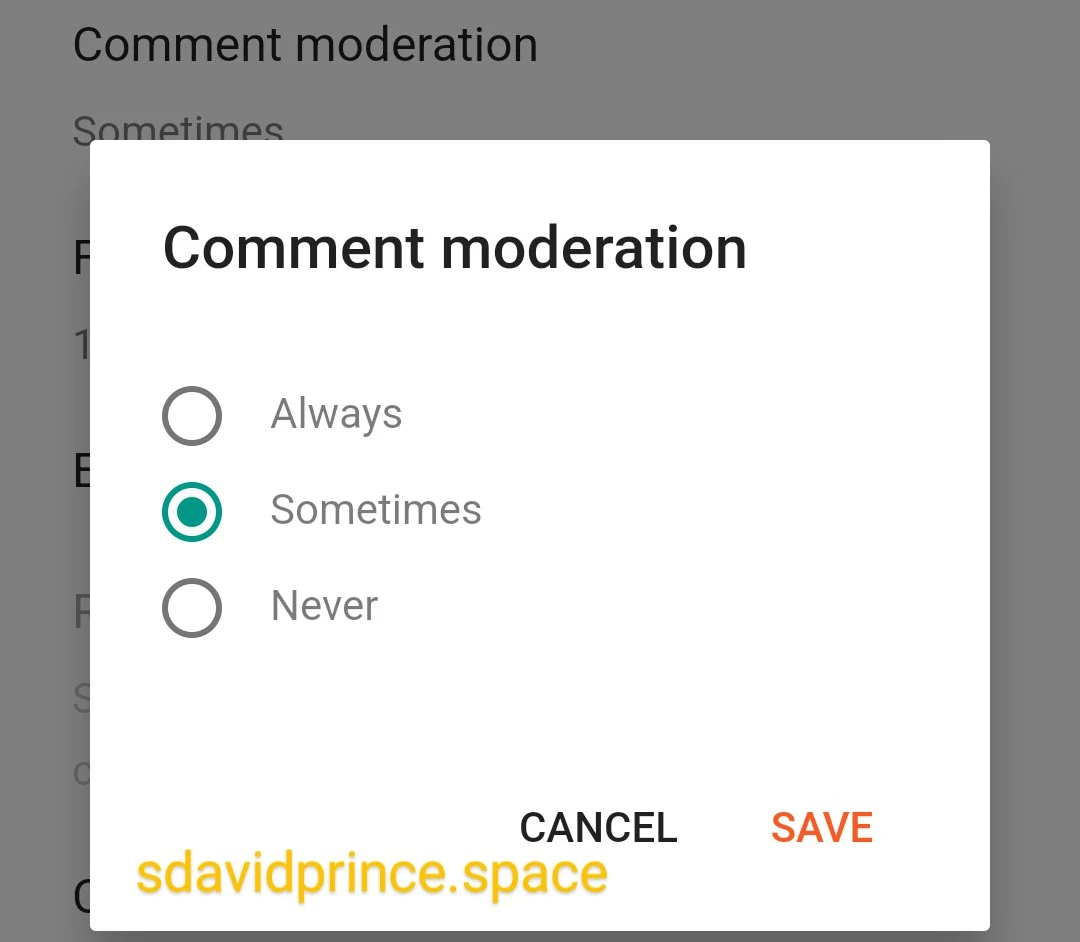
Comment Moderation
The Comment moderation option allows you to set whether visitors comments on blog posts should be published or not without your approval.
It helps you to identify spam and fake comments before they are published under your blog posts.
There are 3 options
(1) Always
(2) Sometimes
(3) Never
Always
This option allows you to enable the moderation on every comment posted on your blog posts. It means a comment will only be published on comments-section If only you approve/moderate it.
Sometimes
This option allows you to enable moderation on comments for those posts which are older than specific days. You can specify the number of days in For posts older than your set date.
Never
Whenever someone posts a comment on your blog posts it will be published on the comments section Immediately without the need for approval .
For Posts Older Than
This setting option becomes active when "Sometimes" is selected as Comment Moderation.
It allows you choose the timeframe after which comments on older posts will require moderation. In this case it is 14 days, which means Users Comments would be published without approval until 15 days pass, then any comment after then would require approval
Email Moderation Requests To
The Email moderation requests to option allows you to enter an email address to receive the notifications of new comments in your mailbox, when posted on your blog posts.
This option is activated only when you choose Always or Sometimes options in the Comment moderation.
With this you can Specify the email address where moderation requests should be sent. This allows you to stay informed and promptly review and approve comments.
Reader Comment Captcha
The Reader Comment captcha is an option to decide whether to show word verification (captcha) for readers who comment. This adds an extra layer of security to prevent automated spam comments.
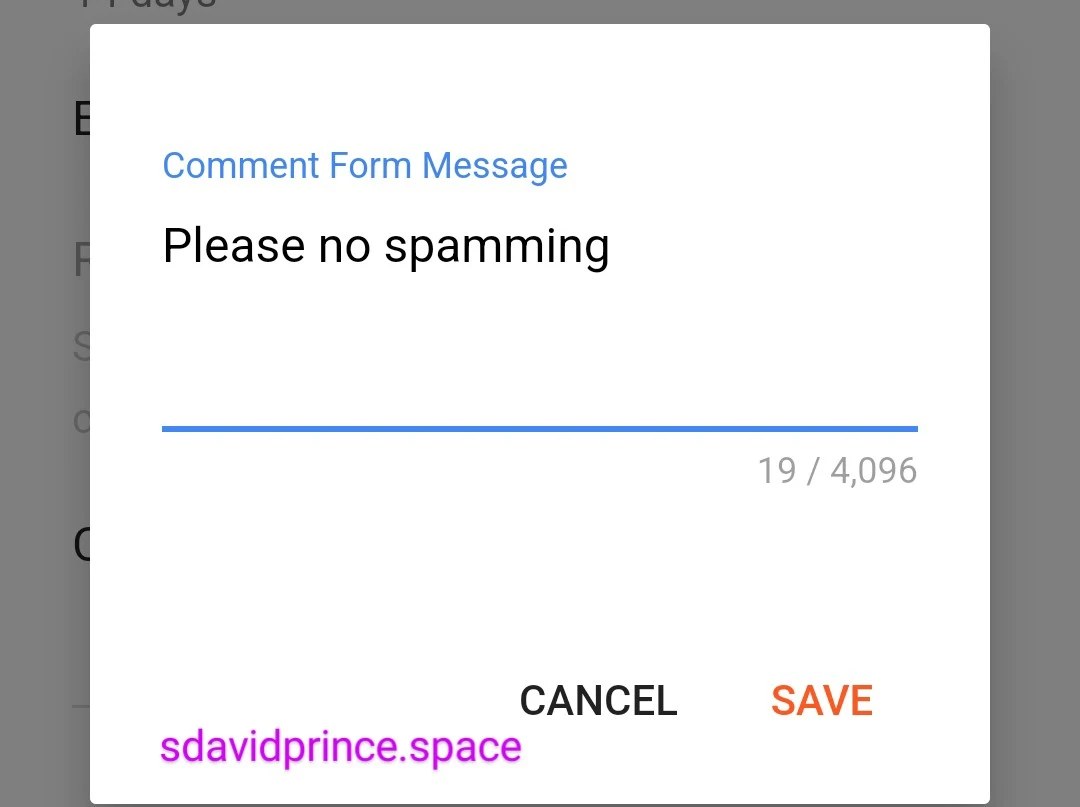
Comment Form Message
This is optional but can be used to communicate specific guidelines or instructions to commenters.
In Comment form message you can enter or customize the message that appears in the comment form. The maximum length of the message is 4096 words.
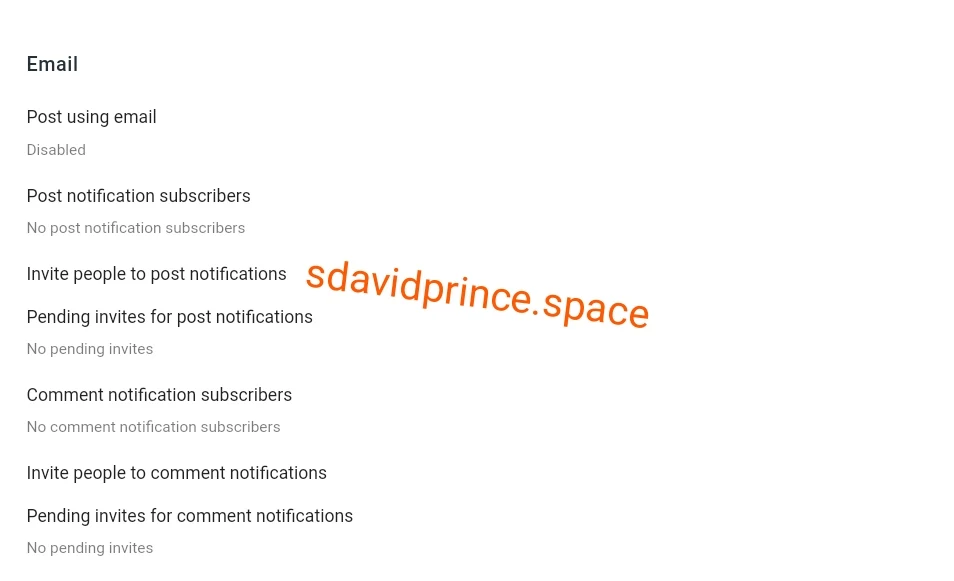
Email Settings
Configuring the "Email" section on your Blogger site involves managing options related to posting and comments notifications via email.
Here's a guide on how to set up these email-related options:
Post Using Email
The Post using email is a powerful feature that allows you to publish new posts on your Blogger blog by sending an email to a specific address.
Ensure that the option is set to "Disabled" if you don't want to allow posting via email.
It means that you can create and publish a post on Blogger without using the Blogger Post Editor, directly from your email account.
How it Works:
You create email from your email account and send that email to your secret Blogger email.
- The Subject of the email becomes the Post Title.
- The Body of the email becomes the Content of the post.
To know how it works, its usefullness, Read this tutorial: What is Post Using Email in Blogger, Its Benefits & How It Works.
Post Notification Subscribers
The “Post notification email” contains those email address/es to which email notifications will be send each time a post is submitted on your blog posts.
Check if there are any subscribers for post notifications. If not, there are currently no individuals receiving email notifications for new posts.
Invite People to Post Notifications
If you want to invite individuals to receive post notifications, click on "Invite people to post notifications" and enter their email addresses. This is useful for readers who want to stay updated on your new content.
Pending Invites for Post Notifications
This is to See the list of Invites. You can also review or verify if there are any pending invitations for post notifications. If there are, review and confirm them.
Comment Notification Subscribers
This is to Add and Check if there are any subscribers for comment notifications.
If not, there are currently no individuals receiving email notifications for new comments.
When a comment is made on your blog, Notification would be sent from blogger to these addresses.
By default, even if not visible, Blogger would send you comment notifications as the nlog owner.
Invite People to Comment Notifications
Similar to post notifications, you can invite people to receive email notifications for new comments by clicking on "Invite people to comment notifications" and entering their email addresses.
Pending Invites for Comment Notifications
See the Invites list, Verify if there are any pending invitations for comment notifications. If there are, review and confirm them.
Formatting Settings
Configuring the "Formatting" section on your Blogger site involves setting the time zone and date formats for various elements on your blog.
Time Zone
Choose your preferred time zone to ensure that timestamps and dates align with your location.
Date Header Format
This setting option allows you to Determine how you want the date to appear in the header of your blog posts. Choose Your most preferred.
Archive Index Date Format
This is to Choose the format for dates in your blog's archive index. This helps organize and display archived posts based on your preferred format, such as "January 2024."
Timestamp Format:
Define the format for timestamps on your blog posts. Select according to your taste or how you want date to be displayed on your post to readers.
Comment Timestamp Format:
Specify how comment timestamps should be displayed.
Meta Tags Settings
Configuring the "Meta Tags" section on your Blogger site involves optimizing how your blog appears in search engine results.
The Meta Tags are embedded in the HTML code of your website for providing the information about your blog or website to search-engines and web crawlers. They help web crawlers to display your blog in the search-engine results in response to users searched queries.
For example, you have a blog about Parenting a Pet. You add Meta Tags (search description) about it like “This blog guides people on how to parent all kinds of pets….”.
Let’s say someone searches “How to Parent a Pet” on Google. In response to this query (Parent Pet) Google will list blogs with the search description containing similar keywords. When this is set your blog might be among those that appears.
Enable Search Description
This allows you to provide a concise and relevant description for your blog that search engines can display in search results.
Search Description
Here you have to Craft a compelling search description that accurately summarizes the content and purpose of your blog.
This description should be concise and informative, enticing users to click on your blog when they see it in search results.
You are only allowed to add a maximum of 150 words in the search description.
This should not be overlooked. By optimizing your meta tags, you improve the visibility of your blog in search engine results and increase the likelihood of attracting relevant traffic to your Blogger site.
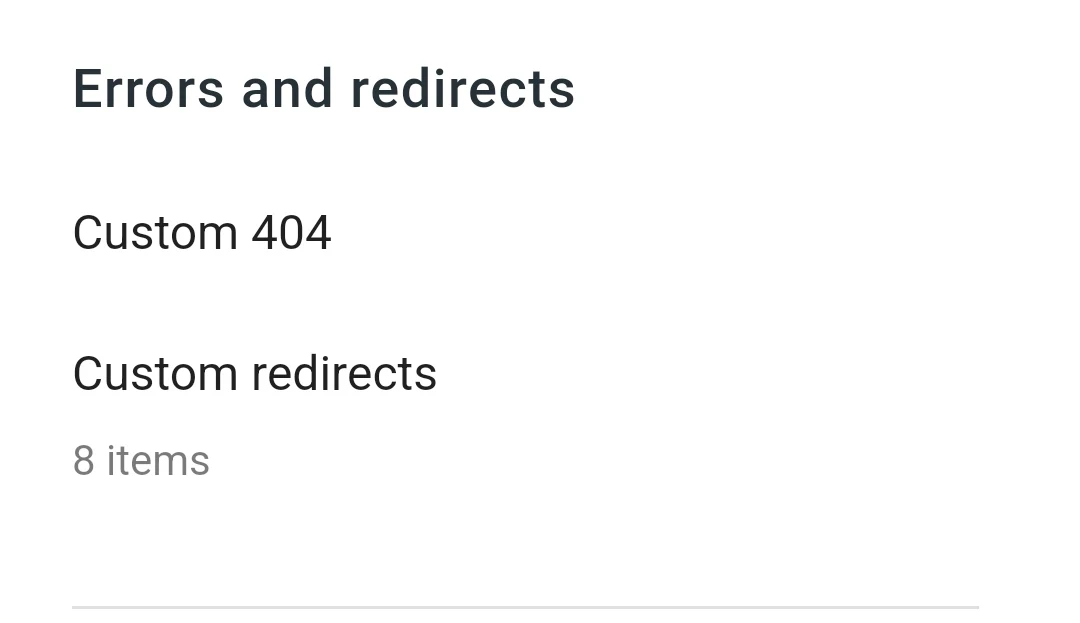
Errors and redirects
Configuring the "Errors and Redirects" section on your Blogger site involves managing how errors and redirects are handled.
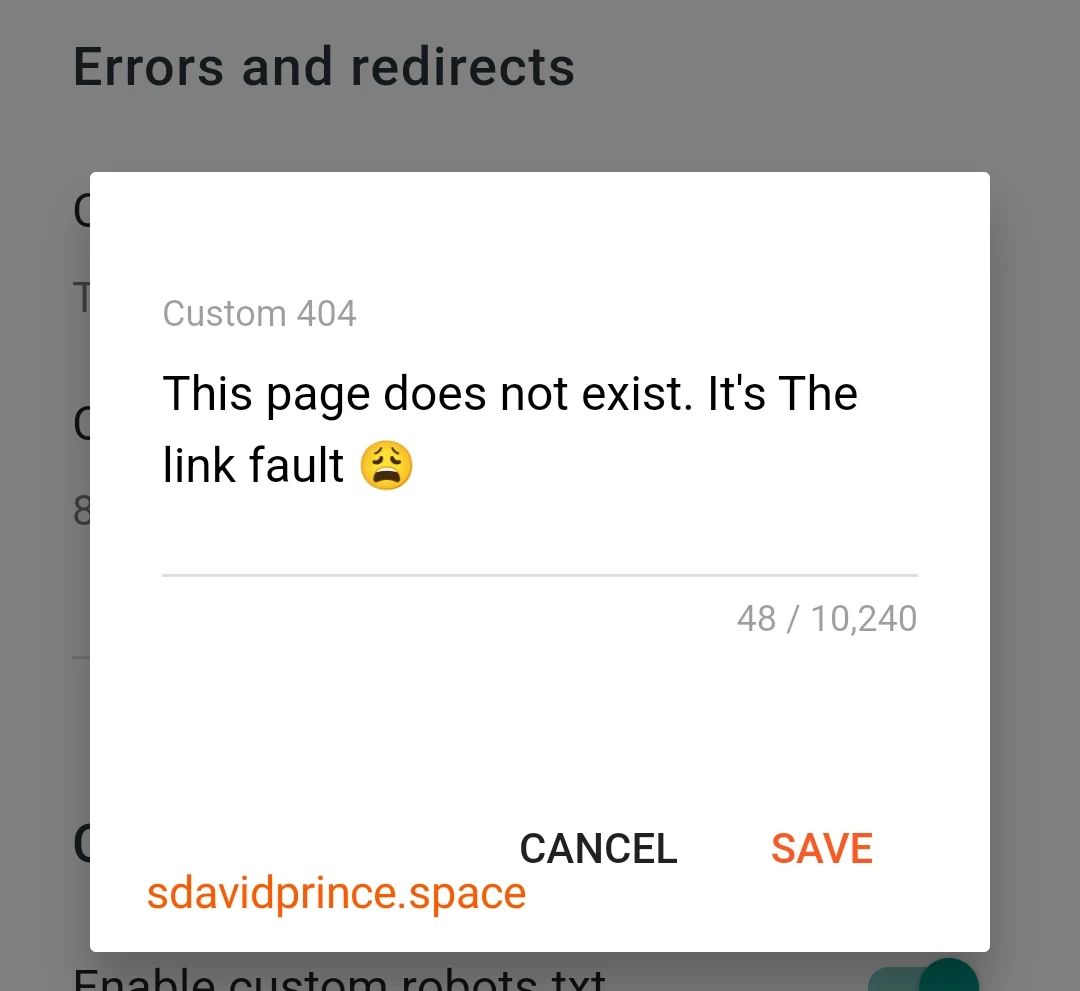
Custom 404:
This option allows you to Customize the message that users see when they encounter a 404 error, indicating that the page does not exist.
Here you can Write your Custom 404 message in Text format or in HTML.
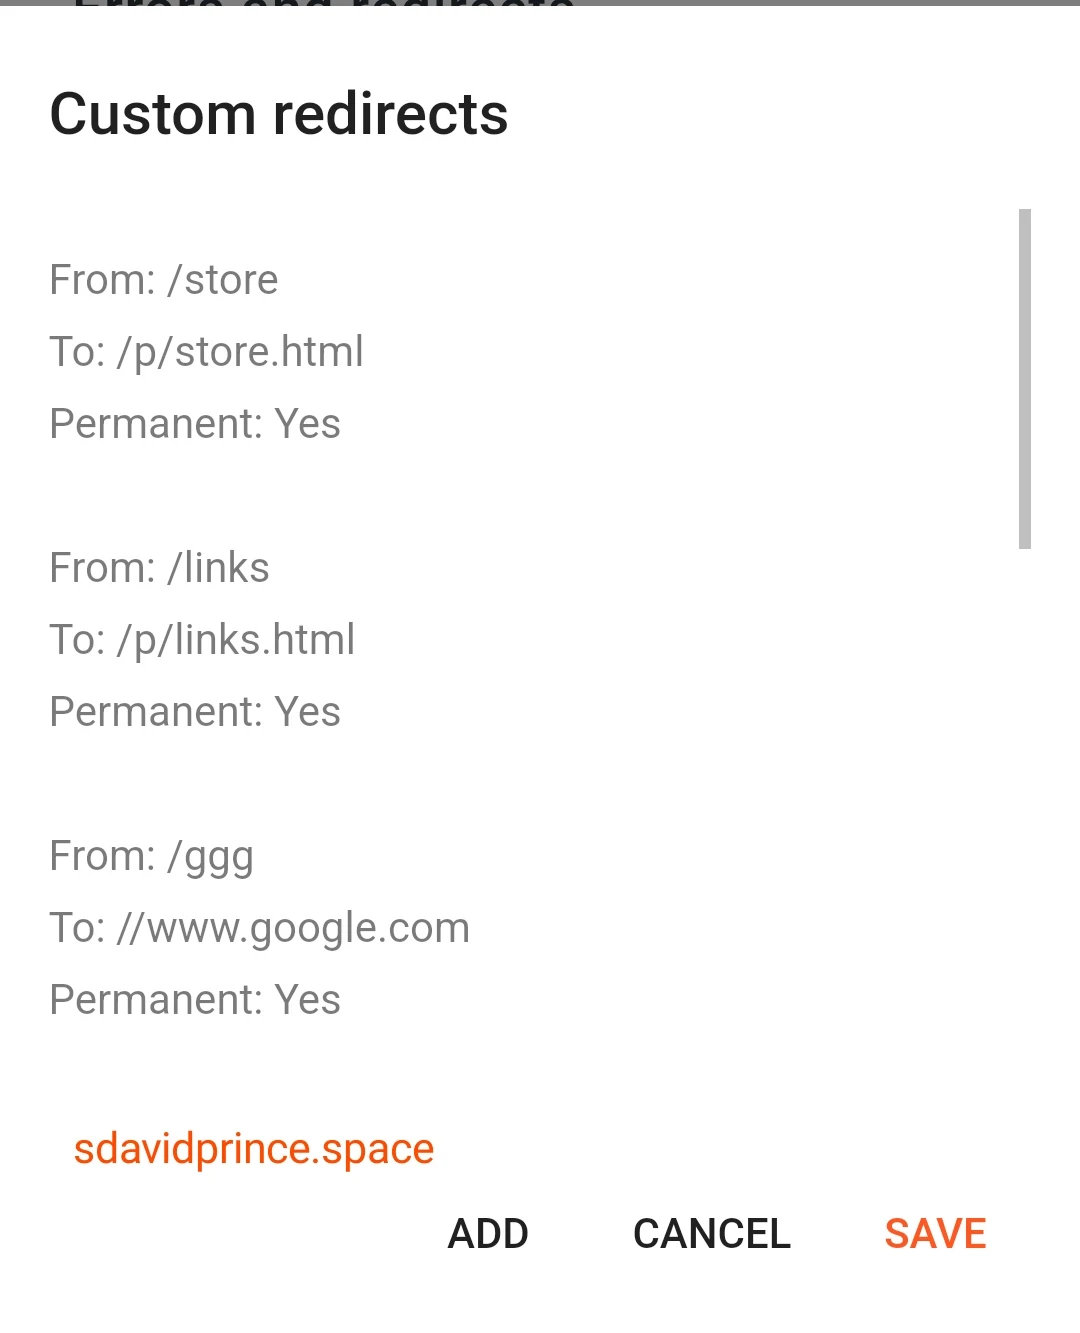
Custom Redirects
This is to Review and manage custom redirects to ensure that users are directed to the correct pages.
- In “From” add the URL of the deleted page (post) or URL of an existing page that you want to redirect to another page of your blog.
- In “To” add the URL of the page (post) you want to redirect to, means From page’s URL will point to this URL.
- Turn on the Permanent option if you want the redirection to be permanent forever and the original page (post) was deleted or not present. You can turn this off or leave it alone if you want redirection to be temporary.
By setting up custom 404 messages and redirects, you can enhance the user experience on your Blogger blog, guiding users appropriately when they encounter errors and ensuring they reach the intended content.
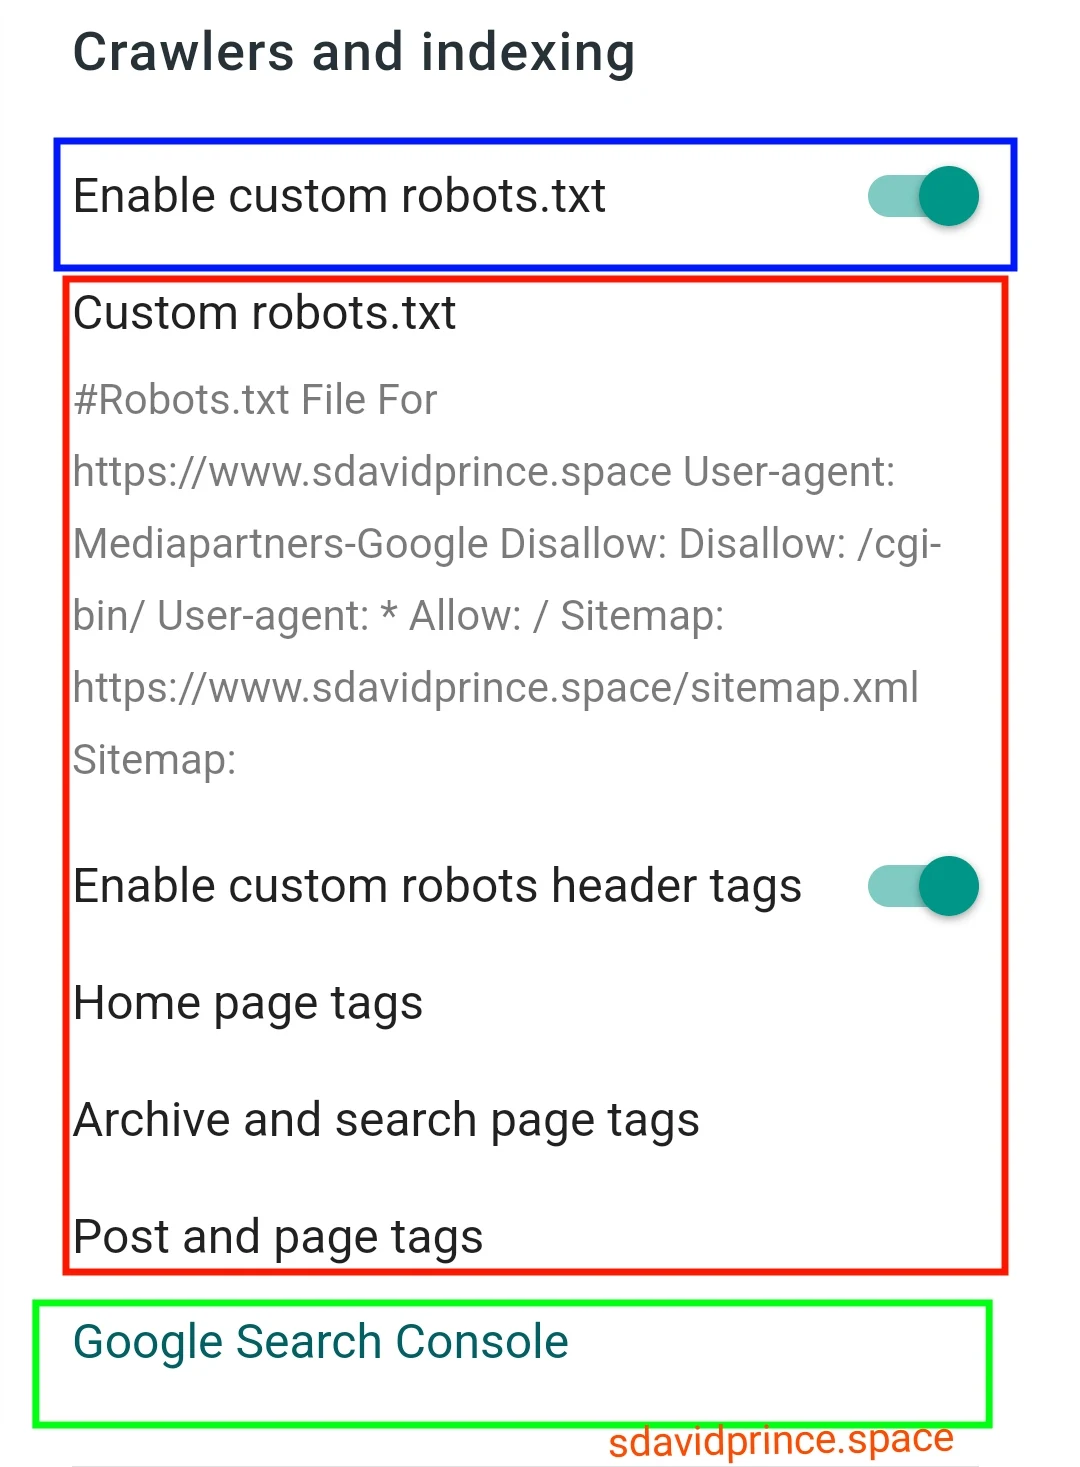
Crawlers and indexing
The "Crawlers and Indexing" section plays a vital role in determining how search engines interact with your blog.
Take Important Note to the settings in this section.
Enabling the custom robots.txt feature allows you to control how search engine crawlers navigate and index your site.
Three key components in this section are the custom robots.txt file, the custom robots header tags and Linking to Google search console.
Custom Robots.txt
The Custom Robots.txt is a simple text file that instructs search engine crawlers & robots which pages, sections, folders, and URLs of a website are allowed to be crawled/traversed and which are not
Before a web robot or crawler wants to visit a URL it first visits Robot.txt and checks whether it is permitted to crawl or not.
This is the most perfect Robots.txt code for a Blogger blog. Copy the code and Paste into your blog Custom Robots.txt.
#Robots.txt File For  https://example.blogspot.com     By

 sdavidprince.space

User-agent: Mediapartners-Google

Disallow:

Disallow: /search

Disallow: /cgi-bin/

User-agent: *


Allow: /

Sitemap: https://example.blogspot.com/sitemap.xml

Sitemap: https://example.blogspot.com/atom.xml?redirect=false&start-index=1&max-results=500

Sitemap: https://example.blogspot.com/feeds/posts/default

Sitemap: https://example.blogspot.com/sitemap-pages.xml
Make sure to replace “example.blogspot.com” with your blogger domain name like “https://yourblog.blogspot.com”.
The line "User-agent: Mediapartners-Google" is a directive specifically targeted at Google's Mediapartners-Google user-agent. eg Adsense, Google Analytics, Seacrh console and others.
The directive "Disallow:" following the user-agent specifies that the content accessible by the Mediapartners-Google bot is not restricted or disallowed. In other words, it grants permission for the Google Mediapartners bot to crawl and index all content on the website, including media-related files.
This is important for optimizing the presentation of media content in Google's search results and ensuring that relevant multimedia elements are properly indexed and displayed.
The User-agent: * This is referring to every other user agent and bots on the web.
And in the same manner, the Disallow directive is to block crawl access.
Disallow: /search" was added to guide web robots to ignore all those Blogger URLs having keyword “/search/” like “https://www.example.blogspot.com/search/label/Blog”.
You can add your URL that you don't want bots to crawl. In another line, Just input "Disallow: /url
Example I have a bookmark and login page or secret page which needed restrictions, then I can add; Disallow: /p/secret-page.html
The Allows: / directive instructs robots that they can visit homepage and all other pages of your blog which are not disallowed in Robots.txt.
The Sitemap is the directive that informs search engines like Google, Bing, etc, about pages on a site that are available for crawling. This is why your Site Sitemap should be there.
Look at this Sitemap URL generator tool
About the Sitemap URLs:
- [ https://example.blogspot.com/sitemap.xml ] pertains only to blogger posts
- [ https://example.blogspot.com/sitemap-pages.xml ] - Pertains to blogger pages
You don't Need you understand all these; You can always Generate your Robot.txt file with this Generator tool
You can also check the robot.txt file of any site by using the permalink "/robot.txt". Add it at the end of the site domain. Like for example, to check this site own, you can enter the URL "sdavidprince.space/robots.txt" on your browser search address bar.
Enable custom robots header tags
The custom robots header tags offer a granular approach to controlling indexing on different pages.
You can set specific directives for the homepage, archive and search pages, as well as individual posts and pages. This level of customization ensures that search engines properly understand and index your content.
Home page tags
Preferred: toggle "all"
Archive and search page tags
Preferred: toggle only "noindex"
Post and page tags
Preferred: toggle "all " and "noodp"
See This, I've Explained extensively : Improve Visibility - Setting Custom Robots Header Tags on Blogger
Google Search Console
This option is just to link to Google Search Console from Blogger.
The Google Search Console is a free web service by Google that allows content creators, bloggers, web masters, etc, to check the indexing status of website and its pages in Google, and provides rich reports and recommendation to optimize the performance of a website.
Make thia tool your best friend so you can monitor and manage your blog visibility.
Follow this Tutorial: How To Connect Blogger Blog to Google Search Console.
This whole section has to be set Carefully as it is very Significant.
And also note that It is not a good SEO practice to allow crawlers and robots to unnecessary crawl admin side contents and pages, archives, and search label URL.
Here is why:
- If your search pages generate a lot of duplicate content or if the search results are not highly relevant, can cause potential SEO issues.
- Or when Users use your site search bar to search and there appeared to be no search results, maybe you've not written that content, the page might be indexed and you might rank lower on the searched keyword.
- Again, If your archive pages contain a significant amount of duplicate content or if they are not user-friendly" it can also create potential SEO challenges.
- By fine-tuning these crawler and indexing settings, you gain control over how search engines interpret and present your blog content in search results, optimizing its visibility and relevance.
Monetization Settings
The "Monetization" section on the Blogger settings tab involves optimizing how advertisements are managed and displayed.
Set up Custom ads.txt settings only if your Blogger blog is monetized with Google AdSense ads. If not then skip this section.
Enable Custom Ads.txt:
Ensure that the "Enable custom ads.txt" option is turned on. This feature allows you to specify a custom ads.txt file that provides information to advertisers and ad networks about authorized sellers of your ad inventory.
Custom Ads.txt
The Custom ads.txt is a file that provides you more control over who’s allowed to sell or display ads on your blog.
Customize the content of your ads.txt file by specifying authorized sellers and their corresponding publisher IDs. This ensures transparency in the advertising ecosystem and helps prevent unauthorized sellers from misrepresenting your ad inventory.
Also View:
- How To Set Up Custom Ads txt in Blogger - Get AdSense Pub ID.
- How to Monetize Blogger Blog with Google AdSense and Display Ads
You can also check the ads.txt file of any site by using the permalink "/ads.txt". Add it at the end of the site domain. Like for example, to check this site own, you can enter the URL "sdavidprince.space/ads.txt" on your browser search address bar.
Manage Blog Settings
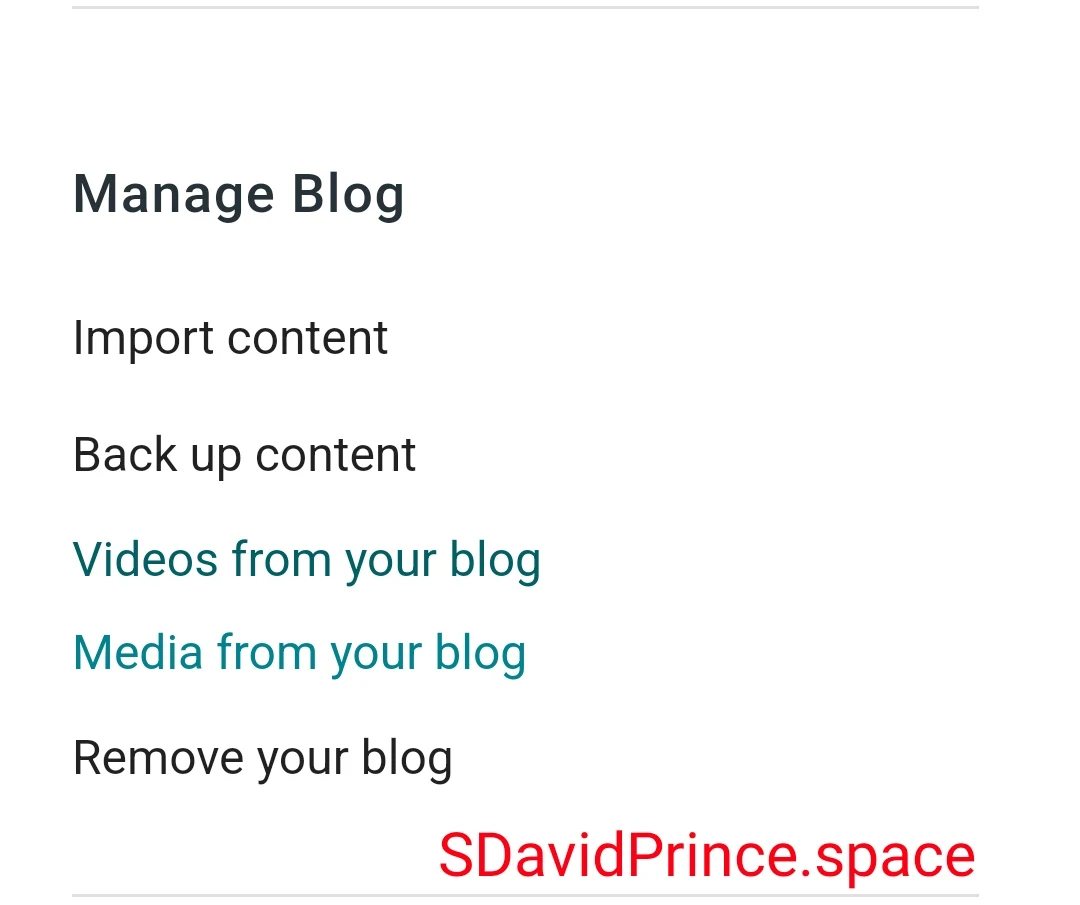
In the "Manage Blog" section of your Blogger settings, you have options to import content, back up content, manage videos and media from your blog, and even remove your entire blog. Here's an overview of these options:
Import Content
This feature allows you to import content from another blog or platform into your Blogger blog. It can be useful if you're migrating your blog from a different platform or if you want to consolidate content from multiple sources.
The file to be imported can only be in XML format
The file should contains Posts & Comments. All the imported Posts will be merged with your existing posts, sorted by date.
Back Up Content
Backing up your content is essential for data security. You can use this feature to create a backup of your blog's posts and settings.
It's a precautionary measure in case of accidental data loss or if you need to restore your blog to a previous state. The Back up content option makes all Post {published, draft or trash posts}, Pages and Comments of your Blogger download in XML file format.
Videos from Your Blog
This section allows you to manage videos that you have uploaded to your blog. You can download,:view, edit, or delete videos from
Media from Your Blog
Similar to the videos section, this area lets you manage other media files (e.g., images) that you have used in your blog posts. You can review, edit, or delete media files as needed.
Remove Your Blog
This option allows you to permanently delete your entire blog. Exercise caution when using this feature, as it will result in the loss of all your blog's content and settings.
Make sure to back up your blog before taking this step if you want to preserve your content.
Deleted blogs can be restored within 90 days before they are removed forever. You can still create another blog at this address using the Google Account you're currently logged in with.
These management tools offer flexibility and control over your blog's content and settings, ensuring that you can make changes or protect your data as needed.
Site Feed Settings
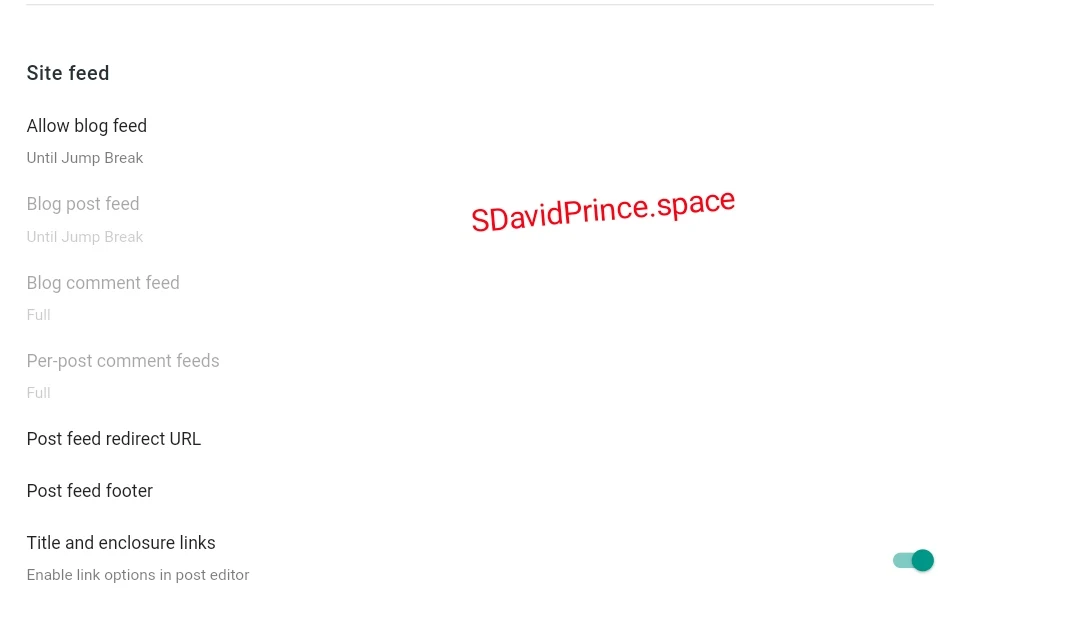
Configuring the "Site Feed" section on your Blogger site involves managing how your blog's feed is generated and presented.
The Site Feed also known as Web Feed, Blog Feed, or News Feed, is a data format (XML-based) that allows people to receive your blog’s latest content (Posts, Comments) on their blogs/websites/browsers/apps without visiting your blog.
When you update or add new content on your blog, the Site Feed automatically notify users who have subscribed to your Site Feed.
If you have a multi-niche blog you can create separate Site Feed link for each category, so that people can subscribe only to those categories whose content they want to read.
The most popular Site Feed formats are RSS, Atom, and JSON Feed.
Blogger supports both RSS and Atom. The RSS Feed is the most widely used site feed format. In order to receive notifications or updated content one has to subscribe to your blog’s RSS Feed link.
Allow Use Feed
Decide whether you want to allow a blog feed. If you choose "Until Jump Break," the feed will include content up to the point where you use the "Jump Break" feature in your posts. This feature allows you to control what appears in the feed, offering a teaser before readers click to view the full post.
Blog Post Feed
Similar to the blog feed, decide how much of your blog posts you want to include in the feed. If you choose "Until Jump Break," the feed will show content until the jump break in each post.
Blog Comment Feed
Choose whether to provide a full feed of blog comments or limit it. Selecting "Full" will include the entire content of comments in the feed.
Per-Post Comment Feeds
Decide whether to provide full feeds for each post's comments. If set to "Full," readers can access the full content of comments directly through the feed.
Post Feed Redirect URL
If you have a specific URL you want to redirect your post feed to, you can enter it here. This is optional, and you can leave it blank if you don't have a specific redirection requirement.
Post Feed Footer
Customize the content that appears at the bottom of your post feed. This is optional and can be used for additional information or messages to your feed subscribers.
Title and Enclosure Links
Enable link options in the post editor if you want to include title and enclosure links in your feed. This allows readers to easily access and share your blog posts.
By customizing your site feed settings, you can control how your blog's content is distributed through feeds, providing flexibility in terms of content visibility and access for your readers.
In order to learn What are the benefits of Site Feed, How to create your Blogger blog’s Site Feed URL, How to display Site Feed on your blog, What are Title & Enclosure Links,
Read this tutorial: How To Set Up Site Feed Settings in Blogger - RSS Feed.
General Settings
In the "General" section of your Blogger settings, you have options related to using Blogger draft and editing/viewing your profile. Here's a brief guide on how to set up these options
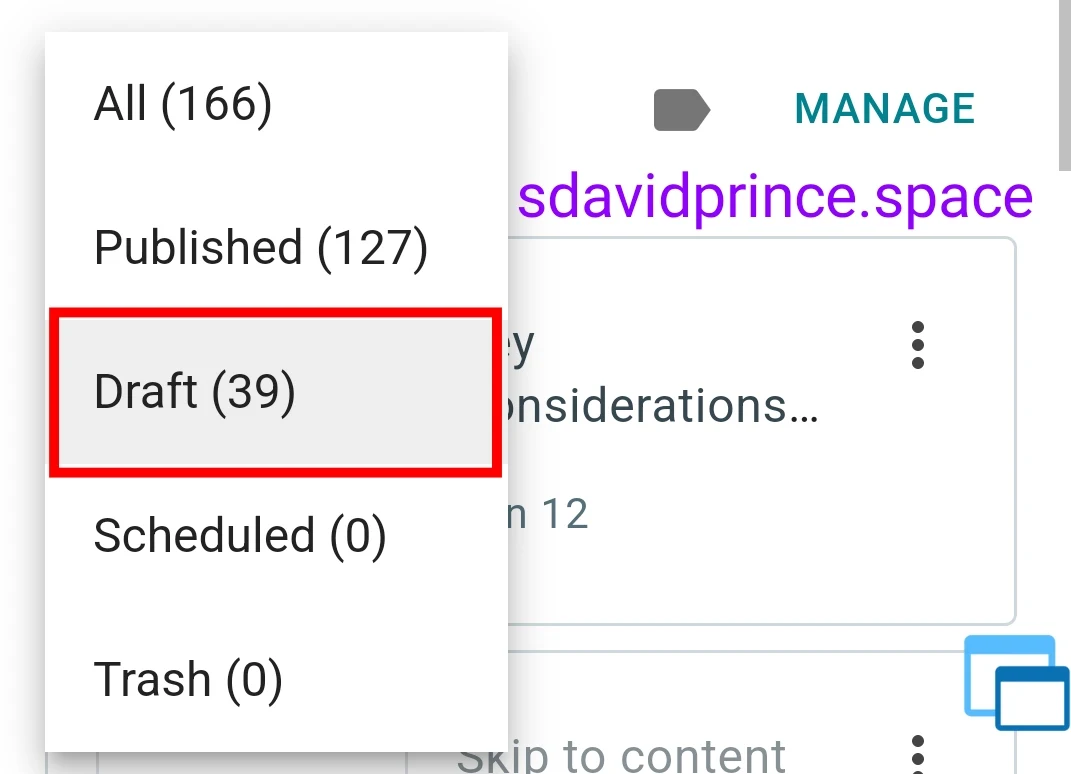
Use Blogger Draft
Decide whether you want to use Blogger draft, which is a feature that allows you to create and edit posts in draft mode before publishing them.
If you prefer to use draft mode, ensure that the option is turned on.
It is Recommended that this should be turned on, so you can always keep posts as draft and always update it before publishing
Read More on this: What is Blogger Draft and How to Use?
Edit Profile
Click on "Edit Profile" to update and customize your Blogger profile.
This may include setting up privacy, your identity, adding a profile picture, updating your bio, and providing other relevant information.
A well-crafted profile enhances your blog's credibility and personalizes your connection with readers.
View Profile
Click on "View Profile" to see how your profile appears to others. This allows you to review the information visible to visitors and make any adjustments if needed
By utilizing these general settings, you can make the most of Blogger's features for drafting and editing content, as well as presenting a polished and professional profile to your audience.
Navigating the Blogger settings tab allows you to tailor your blog according to your preferences and goals, providing you with the tools to create a unique and engaging online presence.
More Advanced Settings
These are just tweakings that are not on the blogger Setting tabs but its Important to see that they are checked in place
Ensuring Mobile-Friendliness
Ensuring mobile-friendliness is essential for providing a seamless and accessible experience to a diverse audience.
This way your site would be optimized for mobile phone users. Please make sure the theme or template you are using is mobile responsive
Customizing the mobile view ensures that your blog's layout is responsive and adapts to different screen sizes, improving user experience for readers on smartphones and tablets.
Additionally, you can make specific adjustments to the mobile settings, such as enabling or disabling mobile templates, depending on your preferences.
How to Set this up
Step 1:
Navigate to the theme tab menu on your blogger dashboard.
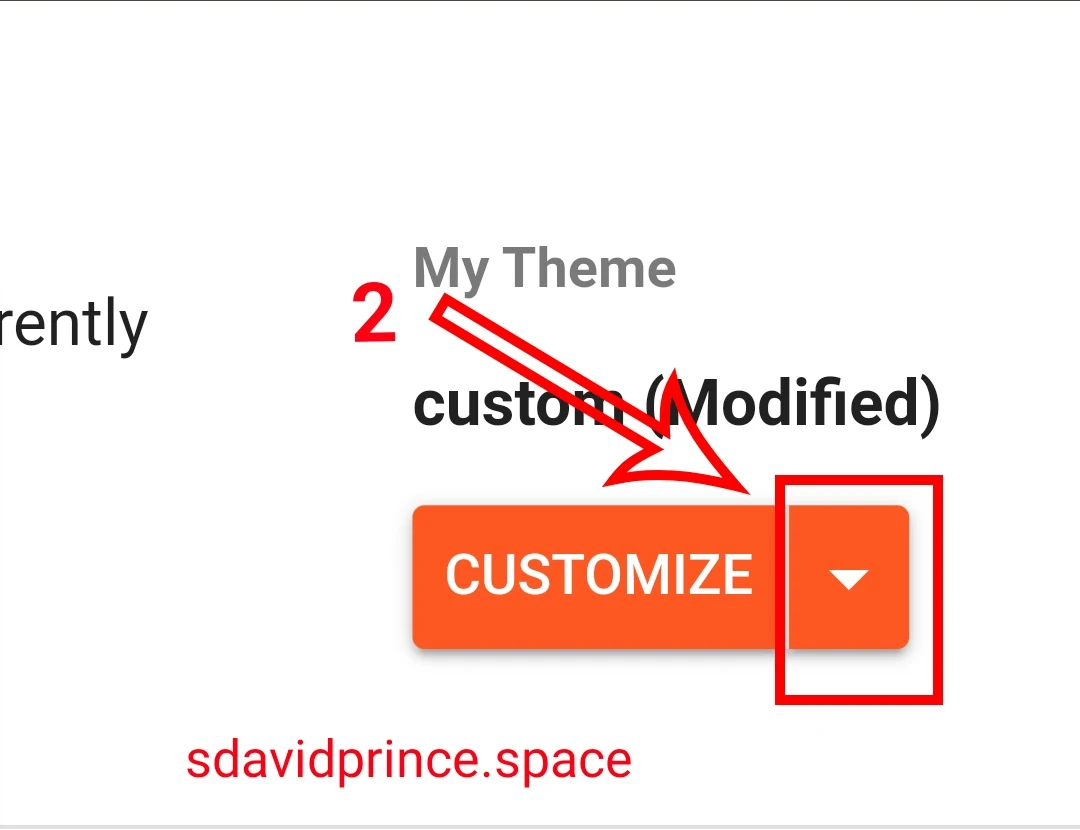
Step 2:
Click or tap on the Customize button dropdown toggle
Step 3:
Click on "Mobile Settings"
Step 4:
Select the option "Desktop" then "Save"
This means that blogger should use Desktop design for mobile users
To explore more on this configuration, and more settings for optimizing mobile-friendliness on your Blogger blog, dive into this guide on Enhancing Mobile Responsiveness for Blogger
Customizing Layout and Theme Design
Customizing the layout and design of your Blogger blog allows you to create a unique and visually appealing online presence.
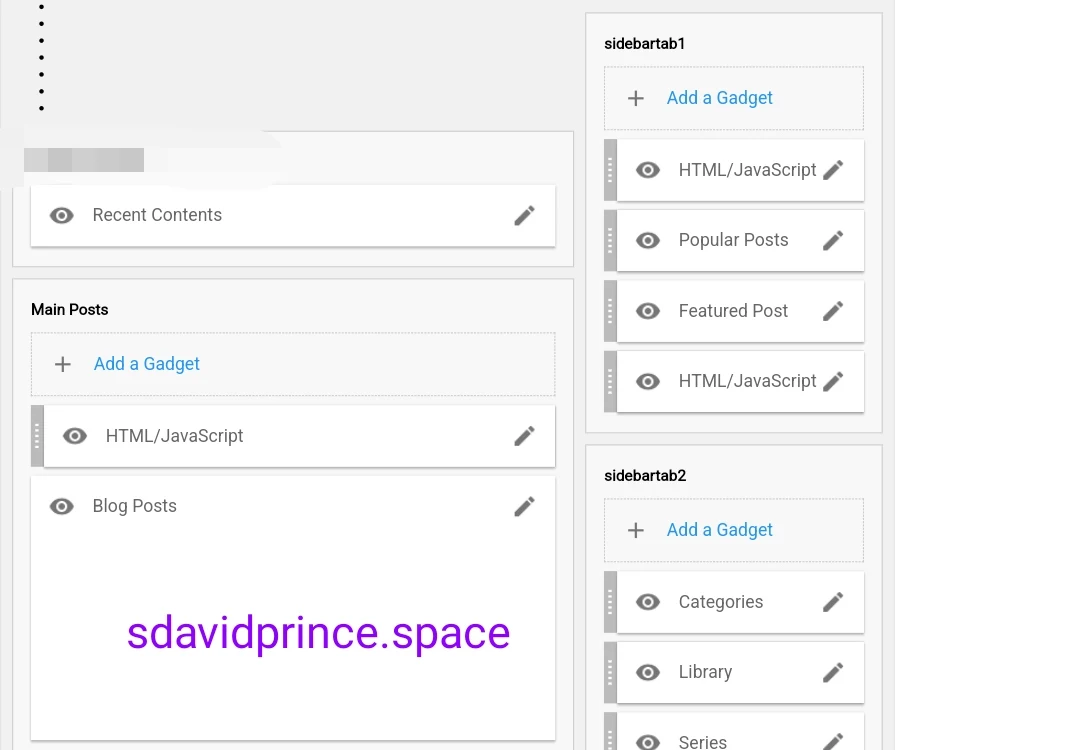
These are tweaks that can be done from the "Layout" Sidebar tab of your blogger dashboard.
You have the power to shape the overall structure of your blog by adding, rearranging, or removing various elements.
From organizing widgets to adjusting the placement of navigation bars, customizing your layout enhances user experience and ensures that your content is presented in an engaging manner.
Additionally, you can explore design options, such as choosing theme colors, setting other color variables, and adding custom CSS to make more intricate modifications.
For a deeper dive into the world of layout and design customization, check out this detailed guide on Advanced Tips for Customizing Blogger Layout and Design.
Final Thoughts
So it was all about setting up your Blogger blog settings. I hope that it would have helped you to set up your Blogger settings.
Create unique, original, and quality content by focusing a niche, about which you’re passionate. If you like this post then don’t forget to share with the other people. Share your feedback in the comments section below.
Happy blogging ! 🫵🏾


